Wednesday, October 17, 2018

Solar Equipment Shed

While waiting for warmer weather for the floor, we needed to get moving on our solar equipment shed.  It will house the batteries, inverter, power panel, etc. and will be placed right by the solar array.  Cooper Power Solutions asked that we make it at least 6'x8'.  We opted to go with 8'x8' to allow us a little extra room for maneuvering heavy batteries in and having a little less waste of materials when we construct the shed.

We decided to put the wall panels and floor framing together at the rental house where we have a garage and a level driveway to make it much easier to keep things square and level.  We are also very happy that we bought the compound miter saw as it made this project also go much faster.  In less than one day, we built the floor and all four walls.  They are stacked in the garage waiting to be transported to the work site.  We opted for a wooden floor rather than a concrete floor, so the floor is heavily reinforced as the batteries weigh a lot!  This shed is solidly engineered.  The roof will be constructed onsite as well.

October has been a little strange for weather in this area and we actually even had some snow while building this.  We've been told that October is normally gorgeous weather here, but instead we're in a cold, windy, wet (gloomy) streak.

We will rent a trailer to transport the floor and wall panels up to the work site.  Well worth the cheap rental price of $15!

Here's the shed floor framed up.  Gads, this sucker is HEAVY!  We did go with pressure treated lumber and it's doubled up 2x6x8 - so yeah, freakin' heavy.  Not sure how we'll get this on the trailer....  We used those orange straps to shuffle it into the garage from the driveway.  I could barely keep my end from dragging on the ground.

Solar Shed Floor
Door Wall (also our north wall)


We did the constructing in the driveway, then moved finished pieces into the garage.


All ready to go.

The floor and all wall panels are framed and ready to go.  You can see the top two (east and west walls) have a sloped top to them - the roof will have a slight pitch to the south so water can run off that way.


The earthworks guy is coming tomorrow to dig the 8ft deep hold for the solar array post.  He'll also be digging the trench for the ground arc.  The ground arc is put in by Cooper Power Solutions to spread out any electricity that might occur should a lightning strike happen.  He will also be bringing a tractor up to help Cooper Power Solutions mount the panels as the unit is 400#.  Once he's done bringing in big equipment like that, we can put our shed up.  We probably are looking at the first or second week of November for that.

Yurt Floor: 4 coats in

So, I've now put two full strength boiled linseed oil coats on the floor and "grouting", as well as two coats of 75% boiled linseed oil/25% mineral spirits.  We would have preferred to use raw linseed oil and a citrus sol thinner, but can't get them locally.  Really expensive to order in, too, so we just used what we could get.  I have used probably 4-4.25 g (guesstimate) of the boiled linseed oil so far.  We plan a fifth and final coat that is the linseed oil with melted beeswax in it.  We have had a cold, wet streak in weather and are waiting for a warmer day to do that final coat.  Probably this Friday or Saturday.

This is how that very first coat looked vs nothing on the floor (only damp wiped):


Here's what the floor is looking like right now:


Everything really darkened, even the "grouting".  There is little color difference between the "grouting" and the "flagstone".  Just an observation.  We don't care one way or the other, really.


Monday, October 8, 2018

Yurt Floor: Finishing Work

So, for three days I went in and filled the cracks and dribbled more water.  Frankly, I am tired of it.  I went in today, and just filled a few little spots and decided I am DONE.  So, I used a good multipurpose tough sponge and a lot of water and did a damp wipe on all of the "flagstone" in between the grouting.  I wanted to clean off the gray granite/clay dust so you could see a proper color difference between the earthen floor and the "grouting".  I tried vacuuming (carefully - didn't want to suck any grouting out!) and it did very little.

Here's a picture from when I first started, so you can see the difference:


Looks a little bit like a giraffe pattern.  It does look pretty cool.  We will see what it looks like tomorrow.  I am hoping to actually begin sealing with linseed oil.

Yurt Raising: Days 6 & 7

It's been long enough since this day, that my memory is running several days' worth of work together.  Fortunately, I took some pictures so I can figure out just what we did.


Paneling and trim is now done.


View from the NW window.


View from NE window.


 Here we are using the granite/clay dust from our well drilling to fill the cracks in the floor.  It should end up looking like grout between flagstones (sort of anyway).


We used the garden sprayed to dribble water into the cracks on the "grout" to help it settle into the cracks and adhere (we hope) to the earthen floor.


And, that was "all" (hah!) for two days' work.

Wednesday, October 3, 2018

Yurt Raising: Day 5

So, the yurt is pretty much raised, but we're taking care of details.  We installed two more windows today.  They went really smoothly, much more quickly than our first window.  We then began installing the interior paneling.  Now, most basic yurts do not come with paneling.  You will see either the inside of your canvas wall or the silver insulation if you added that to your package.  Fortress Yurts is different.  They include two glass windows as part of their basic set up (we paid to add a third) and they include some basic paneling.  This paneling is quite thin and flexible with an interesting grain.  It is also "Green Leaf Certified".

One of the things we really like about Fortress Yurts is that they live in their yurts off grid, they produce their yurts off grid, they purchase lumber from local or regional suppliers and HAND PICK their lumber.  They also choose green products (like the paneling). 

So, we purchased a 40tooth "fine" saw blade for our circular saw.  We purchased some wide painters tape to tape the paneling where we'd be cutting.  Both of these led to nice, smooth cuts - we had no splintery cuts.

We had to create a bit of a make shift work station, but it worked OK.  Nailing in the paneling at times went great, like when we could nail it into an upright.  But, when nailing it into just a keeper board, there was a bit of bounce and it could get a bit frustrating.  That's just the nature of panels.  We firmed it up where we could - using scrap 2x4s wedged in to help decrease the bounce so we could get the nail in.  The company also sent trim boards that go over the seam between panels.  The panels have a really interesting "grain" and nice color.  The trim boards are quite a bit lighter, but we like the contrast.  We're going to probably stain them, but a very light or mostly clear stain.  We feel some sort of protection is needed, but we don't really want to change the color. 

So we got about 5 panels up and called it a day at 5p or so.


 This picture shows how the batten boards change height at the door frame.  We are wondering if we should be concerned at the pressure on the roof vinyl at the corner of the lower board.


This shows the same issue at a window frame.


This is our makeshift workstation for cutting paneling.


 We used painters tape to tape where we'd be cutting to help reduce any splintering.  We ended up running out of tape and used our 40 tooth saw blade on a few cuts without tape and it did great.


First panel up!


Three panels and trim up!!


Five panels up!! Time to call it a day.


Yurt Raising: Day 4

Today, Brent and I were on our own.  We definitely missed our friends and helpers.  Today's first project was to figure out how to handle the roof battens.  Fortress Yurts uses thin, flexible boards that are 8ft long to create a way to roll the roof vinyl and then attach it to the yurt.  It gives a nice, weather proof finish and looks good.

First task was to trim the roof liner fabric and the roof insulation that were overhanging.  We wanted a little overlap, of course, but we didn't want anything showing below the roof batten boards.  Fabric scissors make cutting the roof liner MUCH easier and quicker.

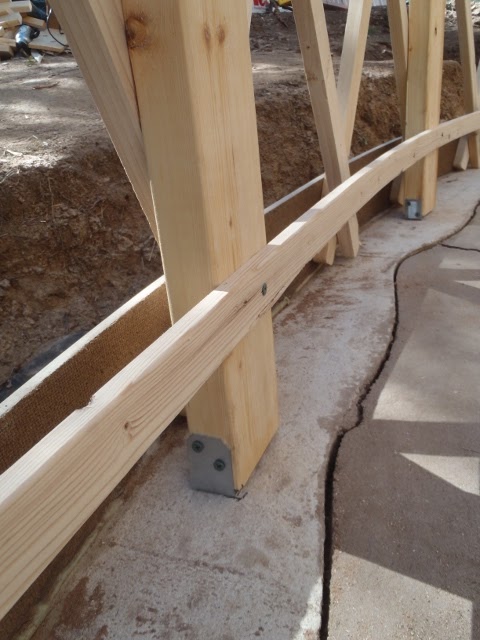
We weren't sure how to tackle this.  Did we staple all the boards in all the way around first and then roll it and attach?  Did we do one at a time or maybe two?  We started to the left of the door and tried rolling it, but then it seemed like it would be a challenge where the next board end would meet the already rolled board.  We fussed with it for a while.  We then did the board over the door.  We were having troubles and getting frustrated.

In the end, we stapled boards generally at the end of the roof vinyl all the way around.  We had to adjust for the boards over the door and window frames - they needed to be stapled a bit higher on the roof vinyl rather than at the edge or they'd hang too low with nothing to attach to.  We weren't sure why that was - did we do something wrong?  (Answer coming later.)

Anyhow, we left about two thumbs' widths between board ends so that we would bind things up when we rolled them.  Once all the boards were attached we began to the left of the door and worked clockwise, rolling the boards under and screwing them to the yurt lattice.  We didn't want to screw this up as this puts a hole in the canvas, so you don't want to have to redo this.  Brent would pull down to pull the vinyl tight and I'd drive the screw in.  It all came out looking pretty good, though one area has some rather large wrinkles that we just couldn't get rid of.

Now, we were seeing that the batten had to go higher over each window and door frame.  Why?  After speaking with Fortress Yurts later, we learned that it is likely due to the commercially produced doors they are now using.  These doors require the height of the lattice to be another two inches taller to avoid what we experienced with the roof battens.  Either that, or a change in the explanation of how to install the roof battens.  Fortress Yurts said they've not had anyone offer them any kind of feedback about this, so they had no idea.  They are very interested in our feedback and pictures, which makes me happy to help. 

So, once the batten boards were done, Brent went up the ladder and cut the hole in the roof vinyl for the dome.  He stapled that in place.  Then he threw out a moving pad from the center ring down to help protect the vinyl for hauling the dome up.  We wrapped the dome in a tarp (leaving the plastic protective coating on the dome) and tied it in securely.  Brent had thrown a rope down from the center ring.  We tied that rope to the rope closing up the tarp.  He climbed the ladder and stood through the open center ring and hauled the dome up over the roof.  That went well.  He unwrapped it and set it in place as he lowered himself down the ladder.  The dome is about 45" across.  It's light, but awkward.

So, the next thing is screwing the dome down to the center ring.  Some yurt companies have a setup where they can attach their domes from within the yurt.  Fortress Yurts is not one of those.  Their dome has a nice gasket that helps seal it tightly against the center ring, but you have to put the screws in from the outside - on the roof.  They show pictures of a couple of options of how to do this.  As we were on our own, there's no pictures of how we accomplished our mission because we were both needed to get the job done.  Brent used one of his static climbing ropes to tie to a tree on the opposite side of where he went up.  (The rope went to the SIDE of the dome, NOT over the top of it.) On the side where he went up, the rope was tied to the bottom rung of the 10 ft ladder.  We had spread out two moving pads on the roof between the lower edge and the dome.  We laid that 10ft ladder on them.  I stood on a 6ft ladder on the ground, holding steady the 10ft ladder laid on the roof while Brent "climbed" up to the dome.  He was able to reach 5 of the 8 screws.  He also worked to pull off about half of the protective plastic.

So, he came on down and then we needed to repeat the process from the other side.  We didn't do it at quite 180*, though.  We made use of the scaffolding this time, and the 10ft ladder, and moving pads and the rope again (different anchor location).  He was able to finish the last 3 screws and get the plastic off.  Phew!  It actually went much better than we thought it would.  It kind of seemed a sketchy way to get up there.

So, next up - the door!  OK, I've never helped hang a door before.  Let me just say it's a pain in the ass!  Seriously, hanging doors sucks.  We managed to get it done and it even opens, closes and locks.  We upgraded from a regular steel exterior door to one with a window in it.  It's nice to have that extra light and frankly, I like looking out a window in my door.  We then put in the first of three windows.  That was it for today!


This shows what we need to trim.


Here's the dome, with its protective plastic cover.  The black you can see at the edge is the gasket.


Brent has cut the center hole and is now stapling it down in preparation for the dome.


Brent working on stapling the roof vinyl in preparation for the dome.


This is what the wall insulation looks like from inside.  You can see that the roof liner hides the silver roof insulation.


Brent has just hauled up the dome and is unwrapping it.


Here, he's set the dome in place.  It's ready to be screwed into the center ring.


The dome from inside - can't even tell it's there!


Our first window (it's on the north side) is installed!  We will likely be doing some trim around the outside.


The cantankerous door is hung and the knobs/lockset installed!

Yurt Raising: Day 3

For Day 3, we really thought we'd get all of the external stuff done:  "skinning" (insulation and covering), the dome, the door and the windows.  Hah!  That didn't happen.

The wall insulation went pretty well, other than some grommets ripping out.  "S" hooks are provided to hang the insulation from the cable while you get it set up.  Great idea, but the grommets much too easily rip from the insulation.  We hadn't wanted to just staple everything in place as we went because we wanted to be sure of a nice smooth wrap, but we had to do a lot of that as we went due to the grommet situation. (The "S" hooks are also used to hang the wall canvas temporarily.  They are later removed and replaced with zip ties securing both wall insulation and wall canvas to the cable.) 

We got both wall insulation and canvas done and they look nice and smooth for the most part.  You then lace a rope through the wall canvas grommets on the bottom and cinch it tight.  This rope stays.  For folks who build a raised deck, the rope is cinched below that deck.  Due to our setup, we added some short pieces of board screwed into the bender board all the way around and our wall is cinched below those boards.

Next up was the roof liner.  This comes in two pieces and is an ecru color.  We thought we understood the directions correctly, but we just couldn't make it work.  We ended up spending at least two hours on something that should've been pretty darned fast.  In the end, we realized that one piece was smaller than the other and they both should have been the size of the larger piece.  We couldn't actually get 100% coverage.  There was a small gap that I used a scrap piece (trimmed from edge overhang) to cover.  It looks OK, but we did stretch things really tight and stapled to the rafters so I'm hoping we don't have any tearing of fabric.  Next up was the roof insulation.  That went smoothly.  It was also in two pieces, but these were the correct size.  The last bit of the roof and the last thing we were able to get done due to daylight running out on us was the roof vinyl.  Brent and I were able to heave it up through the center ring (I kept him on the ladder and he heaved).  From there, Brent worked to unroll it sideways.  The roof vinyl is all one piece and there's only a tiny hole in the center ring.  Ronnee-Sue and I worked from outside to help unroll it.  We got it on, mostly unwrinkled and centered and then we secured it all with a rope pulled tightly around the yurt just under the rafters.

We had to hope for no winds (none were predicted), because we just couldn't get any further.  It had been a pretty frustrating experience with the liner.  Thankfully, everything else went fairly well.

Close up of snow/wind cross piece and short rafter

Keeper boards reinstalled over snow/wind uprights.


This is a close up of one type of bracket we used to attach the snow/wind upright (2x4) to our concrete grade beam.  Another type we used as ACE was out of the first type, formed a "U" that the 2x4 sat in.  Both worked equally well.


This is a close up of the insulation.  We upgraded from just  the regular silver "bubble wrap" type to one with a foam core.


Here we are putting up the wall insulation, hanging it temporarily from "S" hooks hung off the cable.  It's then stapled into the lattice.


Here's Brent stapling the wall insulation.


Wall canvas going on to the "S" hooks.  This color is called "blue teal".  It is a bit lighter than the swatch that was sent, but we like it a little better. We didn't want anything too dark, but we didn't want the whole yurt tan either.


Canvas is on!  Time to lace and screw in the bottom to the bender board.


Here we are putting on the roof liner.  We used the long poles (with clean, non-snaggy ends) to help move the fabric as needed while being able to stand on the platform.


Here's the yurt with the roof liner draped.  The one you see on the right is the one that was correctly sized.  Lots of overhang on that one, as described in the manual.


Stapling the larger piece to the rafters.  At this point, we still didn't realize the other piece was quite a bit smaller.  We made it work well enough.  We didn't have the luxury of waiting until the work week was going again and talking with the company and possibly having to wait for a new piece.  This project is time sensitive.


Here's the roof insulation.  At each long edge (they go over the center), there was a strip of sticky tape.  We had to try and peal the protective paper layer off and then try and stick these two pieces of insulation together.  It was a bit of a reach for sure.


Here you can see the orangey paper covering on the tape.  We're trying to get it peeled off.


Here we've got the roof vinyl on.  We're trying to make sure it's basically even all around - at least even enough to tie a rope around it to hold for the night.


Here we are trying to get that rope around it to hold it for the night.  Not the best stopping place, but we had no choice.  Once we made the decision to put that roof liner on and staple it down, we were committed to see the roof layers all the way through.  It would have been fine if the liner hadn't been such a challenge.

We were on site doing this and cleaning up til dark.  It was a very long day.


Monday, October 1, 2018

Yurt Raising: Day 2

Well, today went a whole heck of a lot slower than we expected.  Today we installed only a portion of the snow and wind kit.  Honestly, we thought we'd easily get that done and even get the yurt skinned.  Guess we were out of our minds to think that!

Suki came with us today.  Yesterday was a super long day for her and I didn't want her to have to repeat that.  The well drilling was done and we were done with carrying big and heavy things down to the site.  She was a very good yurt raising groupie.

So, the snow and wind kit is for places that have a lot of one or the other or both.  In our case, we don't generally get a lot of snow, but winds can be fierce at times.  It seemed a good idea to go ahead and get the kit to be safe.  Likely, we are way over engineered for our area, but that's fine.

So, the snow and wind kit consists of a 2x4 cross piece between each long rafter pair.  Then, there's a half rafter that connects to it and rests on the cable circling the top of the yurt wall.  The last part of it is an upright 2x4 that is beneath each long rafter connecting it to your deck/platform.  In our case, it was connected to the cement grade beam we poured.

Each cross piece required some tricky angled cuts to fit between each rafter pair. So, everyone of them was a custom cut on both ends.  It was tedious and time consuming.  Thankfully, Brent and Bob are both experienced with this kind of thing and worked very well together.  Ronnee-Sue and I just ran around getting them things.

Even the uprights had to be custom cut to fit the rafter they were to sit under.  Ronnee-Sue and I got a few done, but had to wait for the guys to finish portions before we could continue.  At the end of the day, we still had about two thirds of the uprights to finish.


Bob and Brent are working on installing the cross pieces (between long rafters) and as they go they are also installing the half rafters.


Bob gives his best parade wave.


Our work station.  We are so glad our little generator finally came in (just in time for this project!) and that we went ahead and bought that compound miter saw!


Here you can see the cross pieces and the half rafters extending from them to the cable.  You can also see the upright 2x4s beneath each long rafter.  This is one sturdy yurt!


Here's a view showing how the long and half rafters all set on to the cable.  Each has a screw in the end locking the cable in.


Another view.


Here we are nearly finished for the day, though not finished at all with the snow wind kit.