We went up on Saturday morning, the day after we poured the floor, to do a better job with the tarp. We fixed that up and called it good. We did notice there were still a few little puddles on the floor.
On Sunday, Brent went up and burnished the floor with our finish trowel. He used boards to be able to move about on the floor. Burnishing is supposed to bring up finer particles to the surface to give the floor a finer finish. He did have to dry up a couple of the puddles with a towel first.
On Monday, we went up and checked on the floor and tarp. All seemed well.
We checked on the floor Tuesday (yesterday) and found a lot of cracks, some of them rather large. We spent an hour using the garden sprayer and the trowel to work these cracks out. We left with the floor looking great again.
When we checked on the floor this afternoon, holy smokes - even more cracks than before, though they weren't as wide. Ugh. Brent spent some more time working the floor. It was much harder to do and some of the cracks really weren't pushed closed like yesterday, they were sort of just filled in from above. Some were already becoming noticeable again before we left. We will just have to fill any cracks later, when the floor is dry and before we seal it.
I read about what might have gone wrong. We think it was that there was just too much moisture. A wetter mix is easier to work and spread and smooth, but it tends to have more cracking issues. Because of that deluge of rain the night before we poured and the rain that occurred during the pour, we just ended up with too much moisture. I guess we should have waited 2-3 days and then poured our last layer. Oh well, we figure it will work out just fine in the end with patching the cracks.
Wednesday, August 29, 2018
Sunday, August 26, 2018
Yurt: Earthen Floor Part 3
Last Thursday evening a rather vigorous monsoon cell blew through dumping rain at the rate of 3"/hr. We ended up with a little over 1.5" in a short amount of time. We were sort of cringing, wondering if we'd find a swimming pool within our bond beam at the yurt site.
On Friday morning, we met with Cooper Power Solutions, LLC to sign our contract with them and make a down payment for their materials and services. After leaving the coffee shop, we ran an errand at the post office and as we were headed in, our contractor, Brian, was headed out. Gotta love small towns! We had an impromptu chat about the house design. Up walked Jen Cooper, whom we'd just met with and she told Brian not to run off as she needed to chat with him about something too.
So, anyhow, this all meant a later start at the yurt site than normal and we didn't get going until about 10am. It had indeed rained heavily at the site, but there were not even puddles, let alone a pool, in the yurt floor so that was good. Some of our screened adobe was washed away, but it didn't seem like we'd lost that much. Everything was nice a wet, so we used a lot less water than we had expected.
Brent mixed the screened adobe and water with his hands.
We used 2x2's and a 2x4 to create sections for me to work in. We kept them small enough that I could fairly easily reach all the way across and be able to blend sections together. Brent brought me buckets of glop and dumped them out in my workspace - looking like huge cow pies. I had my two trowels ready to go, one to do the main spreading and leveling and one to do the smoothing out. I spent the day pretty much crouched. I'm amazed my knees were able to handle it.
This and the bond beam are my first experiences with troweling anything other than the two sets of straw bale benches we've made at previous homes. Those were OK to be rough and meant to have some texture. I found that, even with all the moisture we had in the mix and raining on us at times, I still made good use of the garden sprayer at times. It really helped me blend between the sections and get a much smoother finish with the pool trowel.
We had a big tater wagon thunderstorm roll through - took about two hours for it to pass over. Poor Suki was not a happy camper. She and I went and sat in the truck for a bit to give her a little break. We got some rain, but fortunately not too much and not heavy. We had hoped we'd screened enough to finish, but we hadn't. We ended up having to screen another wheel barrow and a half in order to finish. The final layer was about 2" thick. We weren't done until 7pm and we were exhausted. It was another extra strength tylenol kind of day.
On Saturday, we went up around 9a and put a tarp up like a tent over the yurt floor. We want to protect it from direct sunlight, lest it dry unevenly and we don't want more moisture added to it as we want it to dry. The tarp, a 20'x40' beast, gave us trouble. It's not a heavy duty one as we were trying not to spend a ton of money on a tarp. But, it gave us trouble in an unexpected way - the grommets were ripping right out of the dang tarp, tearing open a hole. It was a bit of a balancing act to get it tight enough without putting too much torque on it. We did see a few small puddles on the surface of the yurt floor, where, from the rain yesterday, there was still some surface water (and apparently I didn't get things perfectly level).
This morning, Sunday, Brent went up to check on the floor. He used an old towel to soak up any remaining puddles. He then took our finishing trowel (pool trowel) and burnished the floor with it. He had to wet down some flat/smooth pieces of wood and lay them down on the floor to kneel on. Then worked the trowel in some sweeping motions. The burnishing (sort of polishing) brings up some moisture and finer particles to the surface and creates a much smoother looking floor. I took lunch up later and it does look really nice. I do, however, see that it did make some changes to the floor that mean it isn't quite as level as it had been. Hopefully it is more a visual illusion while the floor is still damp and not any real changes that will cause some issues once furniture is in place. The pictures I took of the burnished floor don't really show the difference that you can see in person.
So, the next step for the floor is waiting for it to fully dry before we can seal it with linseed oil. I've researched online and can't find anyone saying how to tell when the floor is dry. I even reached out to a person who has installed many earthen floors and in the same climate as we are in and he can't really give me any real way to tell. Hopefully it will be dry before the yurt gets here, which is supposed to be about September 13th. It'd be nice to have it sealed by then as well, but we'll have to wait and see. In the meantime, we have some "terra forming" to do. We need to gentle the slope above the yurt and bring in some more rock to fill in the rest of the trench. We need to treat the bender board with some linseed oil also and a few other small projects.
On Friday morning, we met with Cooper Power Solutions, LLC to sign our contract with them and make a down payment for their materials and services. After leaving the coffee shop, we ran an errand at the post office and as we were headed in, our contractor, Brian, was headed out. Gotta love small towns! We had an impromptu chat about the house design. Up walked Jen Cooper, whom we'd just met with and she told Brian not to run off as she needed to chat with him about something too.
So, anyhow, this all meant a later start at the yurt site than normal and we didn't get going until about 10am. It had indeed rained heavily at the site, but there were not even puddles, let alone a pool, in the yurt floor so that was good. Some of our screened adobe was washed away, but it didn't seem like we'd lost that much. Everything was nice a wet, so we used a lot less water than we had expected.
Brent mixed the screened adobe and water with his hands.
 |
| Hand mixing adobe and water. |
We used 2x2's and a 2x4 to create sections for me to work in. We kept them small enough that I could fairly easily reach all the way across and be able to blend sections together. Brent brought me buckets of glop and dumped them out in my workspace - looking like huge cow pies. I had my two trowels ready to go, one to do the main spreading and leveling and one to do the smoothing out. I spent the day pretty much crouched. I'm amazed my knees were able to handle it.
 |
| Setting up for first section. |
 |
| First section done and starting on next one. |
 |
| Close up of first section. |
 |
| Getting next section setup. |
This and the bond beam are my first experiences with troweling anything other than the two sets of straw bale benches we've made at previous homes. Those were OK to be rough and meant to have some texture. I found that, even with all the moisture we had in the mix and raining on us at times, I still made good use of the garden sprayer at times. It really helped me blend between the sections and get a much smoother finish with the pool trowel.
We had a big tater wagon thunderstorm roll through - took about two hours for it to pass over. Poor Suki was not a happy camper. She and I went and sat in the truck for a bit to give her a little break. We got some rain, but fortunately not too much and not heavy. We had hoped we'd screened enough to finish, but we hadn't. We ended up having to screen another wheel barrow and a half in order to finish. The final layer was about 2" thick. We weren't done until 7pm and we were exhausted. It was another extra strength tylenol kind of day.
 |
| Done! It's quite wet looking because it's quite wet. It'd been raining. |
On Saturday, we went up around 9a and put a tarp up like a tent over the yurt floor. We want to protect it from direct sunlight, lest it dry unevenly and we don't want more moisture added to it as we want it to dry. The tarp, a 20'x40' beast, gave us trouble. It's not a heavy duty one as we were trying not to spend a ton of money on a tarp. But, it gave us trouble in an unexpected way - the grommets were ripping right out of the dang tarp, tearing open a hole. It was a bit of a balancing act to get it tight enough without putting too much torque on it. We did see a few small puddles on the surface of the yurt floor, where, from the rain yesterday, there was still some surface water (and apparently I didn't get things perfectly level).
 |
| Tarp to protect from sun and rain. |
This morning, Sunday, Brent went up to check on the floor. He used an old towel to soak up any remaining puddles. He then took our finishing trowel (pool trowel) and burnished the floor with it. He had to wet down some flat/smooth pieces of wood and lay them down on the floor to kneel on. Then worked the trowel in some sweeping motions. The burnishing (sort of polishing) brings up some moisture and finer particles to the surface and creates a much smoother looking floor. I took lunch up later and it does look really nice. I do, however, see that it did make some changes to the floor that mean it isn't quite as level as it had been. Hopefully it is more a visual illusion while the floor is still damp and not any real changes that will cause some issues once furniture is in place. The pictures I took of the burnished floor don't really show the difference that you can see in person.
So, the next step for the floor is waiting for it to fully dry before we can seal it with linseed oil. I've researched online and can't find anyone saying how to tell when the floor is dry. I even reached out to a person who has installed many earthen floors and in the same climate as we are in and he can't really give me any real way to tell. Hopefully it will be dry before the yurt gets here, which is supposed to be about September 13th. It'd be nice to have it sealed by then as well, but we'll have to wait and see. In the meantime, we have some "terra forming" to do. We need to gentle the slope above the yurt and bring in some more rock to fill in the rest of the trench. We need to treat the bender board with some linseed oil also and a few other small projects.
Wednesday, August 22, 2018
Yurt: Earthen Floor Part 2
On August 20th, we removed the tarp from our first layer of adobe flooring. We used the garden sprayer to mist it down again before covering it back up. We spent this day screening more dirt for the second layer of adobe flooring. The ratio was the same (4 shovels of clay: 1 shovel of B horizon soil) but less straw than the first layer (we did two fairly large fistfuls for the first layer and went to just one fistful for this second layer - we were kind of wondering if we used a bit too much straw in the first layer). We did 15 wheel barrow full loads.
On August 21st (yesterday), we came in and removed the tarp. Everything was nice and damp. Brent used our leaf rake to rake the excess straw from it and do a little light scratching as he did so. The scratches would help the second layer adhere, so would the dampness and the straw sticking up (that didn't rake up).
 |
| Adobe mix screened with quarter inch hardware cloth. |
On August 21st (yesterday), we came in and removed the tarp. Everything was nice and damp. Brent used our leaf rake to rake the excess straw from it and do a little light scratching as he did so. The scratches would help the second layer adhere, so would the dampness and the straw sticking up (that didn't rake up).
 |
| First layer of adobe looking good. |
 |
| Using leaf rake to rake excess straw from surface of 1st layer. |
 |
| Excess straw. |
We used two 5 gallon buckets to transfer the pile of adobe to the yurt floor. I shoveled and filled while Brent carried them over and dumped them. I am not able to really lift them when filled to the top the way he wanted. He carried 76 buckets of adobe into the yurt floor. That's a lot of dirt!
 |
| 76 piles of adobe ready for leveling. |
The next step was to use the leveling rake to level all the little piles.
 |
| Roughly leveled with leveling rake. |
We didn't worry about getting it perfect. The next step is dampening and tamping. It was a sunny, breezy day so I was kept busy with dampening things while Brent did all the tamping. He went over the whole things three times, but did it in sections. Again, we found it tamped down tighter than we expected so we still have up to 2" to fill in spots to bring it up to the level of our bond beam.
 |
| Second layer of adobe done! |
A final dampening was done before covering it again with the tarp to keep it from drying out. Today, August 22nd, we screened 11 wheel barrow fulls of adobe for our final layer of our earthen floor. We will screen another 4 tomorrow. Our mix was different this time. We did 4 shovels clay:2 shovels Horizon B soil:1 shovel sand all screened through 1/4" hardware cloth. We couldn't find 1/8" and the aluminum window screening proved too small. We will use it, though, to screen some extra adobe mix that will then be used for any patching of cracks, etc. The "Big Day" is Friday when we will put in the third layer. We bought a plant watering can and some very straight boards to help us set up sections and use as scree boards. This will be a bit more of a poured layer. We won't be tamping this one and there will be quite a bit more water involved. The previous two layers took about 23g of water each. Brent is thinking that we will be laying this layer at a bit thicker consistency than our soil cement bond beam was. We'll see how it goes. Adobe dries more slowly and can be worked for a longer period of time, which is good as this is 300sf we're doing here. Friday's going to be a long, dirty day!
Sunday, August 19, 2018
Yurt: Earthen Floor Part 1
Today began with us laying out the two sheets of 10' x 25' 6 mil plastic and me cutting it to fit the dirt floor of the yurt (so inside of the bond beam) while Brent began screening and hauling up another 20 five gallon buckets of sand. When I finished with the plastic, I went down to help with the screening.
Once that was done, it was time to work with the coarse adobe layer. I had previously screened some of our dirt with half inch wire mesh. So, we put 5 FULL five gallon buckets into our wheel barrow with a large two fisted handful of chopped straw (bought in a compressed "brick" at Tractor Supply) per bucket. To make the mixing easier, we added one bucket at a time, mixing with straw each time a bucket was added.
That was then used to begin a pie shape wedge of adobe that we thought would end up about an inch think.
We used the garden sprayer to wet the sand before dumping the adobe/straw mix onto it and then used the leveling rake to help evenly spread the mixture. Brent then used the tamper to tamp it all down. I used a piece of 2"x4" to tamp the adobe alongside the bond beam where it was hard for the tamper to get in. At first, we were misting each bucket of mixture after it was dumped and after Brent raked it level-ish, I was spraying it again before he tamped. The tamper built up in the clay quite often and needed frequent scraping. We backed off a bit on the amount I sprayed before he began tamping and fewer scrapings of the tamper were required.
The layer tamped down quite a bit and we got less than an inch from it. So, we figure we will either be doing thicker layers for the next two or doing a fourth layer overall. It was another fairly long day. It took the two of us about 7 hrs or so to take care of the plastic, the second layer of sand and the first layer of adobe.
We fairly heavily misted the entire yurt floor with the sprayer and then covered it with a tarp. It is hot and dry with a bit of a breeze and we don't want it drying out too fast.
Tomorrow we will mostly be screening clay/soil together through quarter inch hardware cloth to create a little finer adobe mix. This will also be mixed with some chopped straw, but a smaller amount. We are going to need a lot, so that's probably about all we'll do tomorrow. It is easier work than today's so will give us a bit of a break.
 |
| 6 mil plastic and 2nd layer of sand done. |
 |
| Mixing Adobe and straw. |
That was then used to begin a pie shape wedge of adobe that we thought would end up about an inch think.
 |
| 1st pie wedge of coarse adobe layer. |
 |
| Tamped (left) vs untamped (right). |
The layer tamped down quite a bit and we got less than an inch from it. So, we figure we will either be doing thicker layers for the next two or doing a fourth layer overall. It was another fairly long day. It took the two of us about 7 hrs or so to take care of the plastic, the second layer of sand and the first layer of adobe.
 |
| First layer of adobe done! |
 |
| First layer of adobe (coarse) close up. |
We fairly heavily misted the entire yurt floor with the sprayer and then covered it with a tarp. It is hot and dry with a bit of a breeze and we don't want it drying out too fast.
Tomorrow we will mostly be screening clay/soil together through quarter inch hardware cloth to create a little finer adobe mix. This will also be mixed with some chopped straw, but a smaller amount. We are going to need a lot, so that's probably about all we'll do tomorrow. It is easier work than today's so will give us a bit of a break.
Saturday, August 18, 2018
Ant hills!
OK, not really. Brent screened (quarter inch) 20 five gallon buckets worth of sand and hauled them up a hill to the platform. Each bucket he dumped looked like an ant hill.
 |
| Sand screening set up (quarter inch). |
 |
| The Hill. |
 |
| The "ant hills". |
I also worked on screening our soil for the adobe floor. Remember that we separated our B and C horizons, with our C being very clay-ey. I screened 4 shovels of C to one shovel of B as I went, helping mix it all in. I used a half inch square screening. I did 10 shovel fulls to each stint at screening and there were four screen fulls to each wheel barrow and I did 7 loads in the wheel barrow. That's a lot of dirt.
 | |
| Coarse adobe layer screening set up. |
 |
| Screening with half inch, right into wheel barrow. |
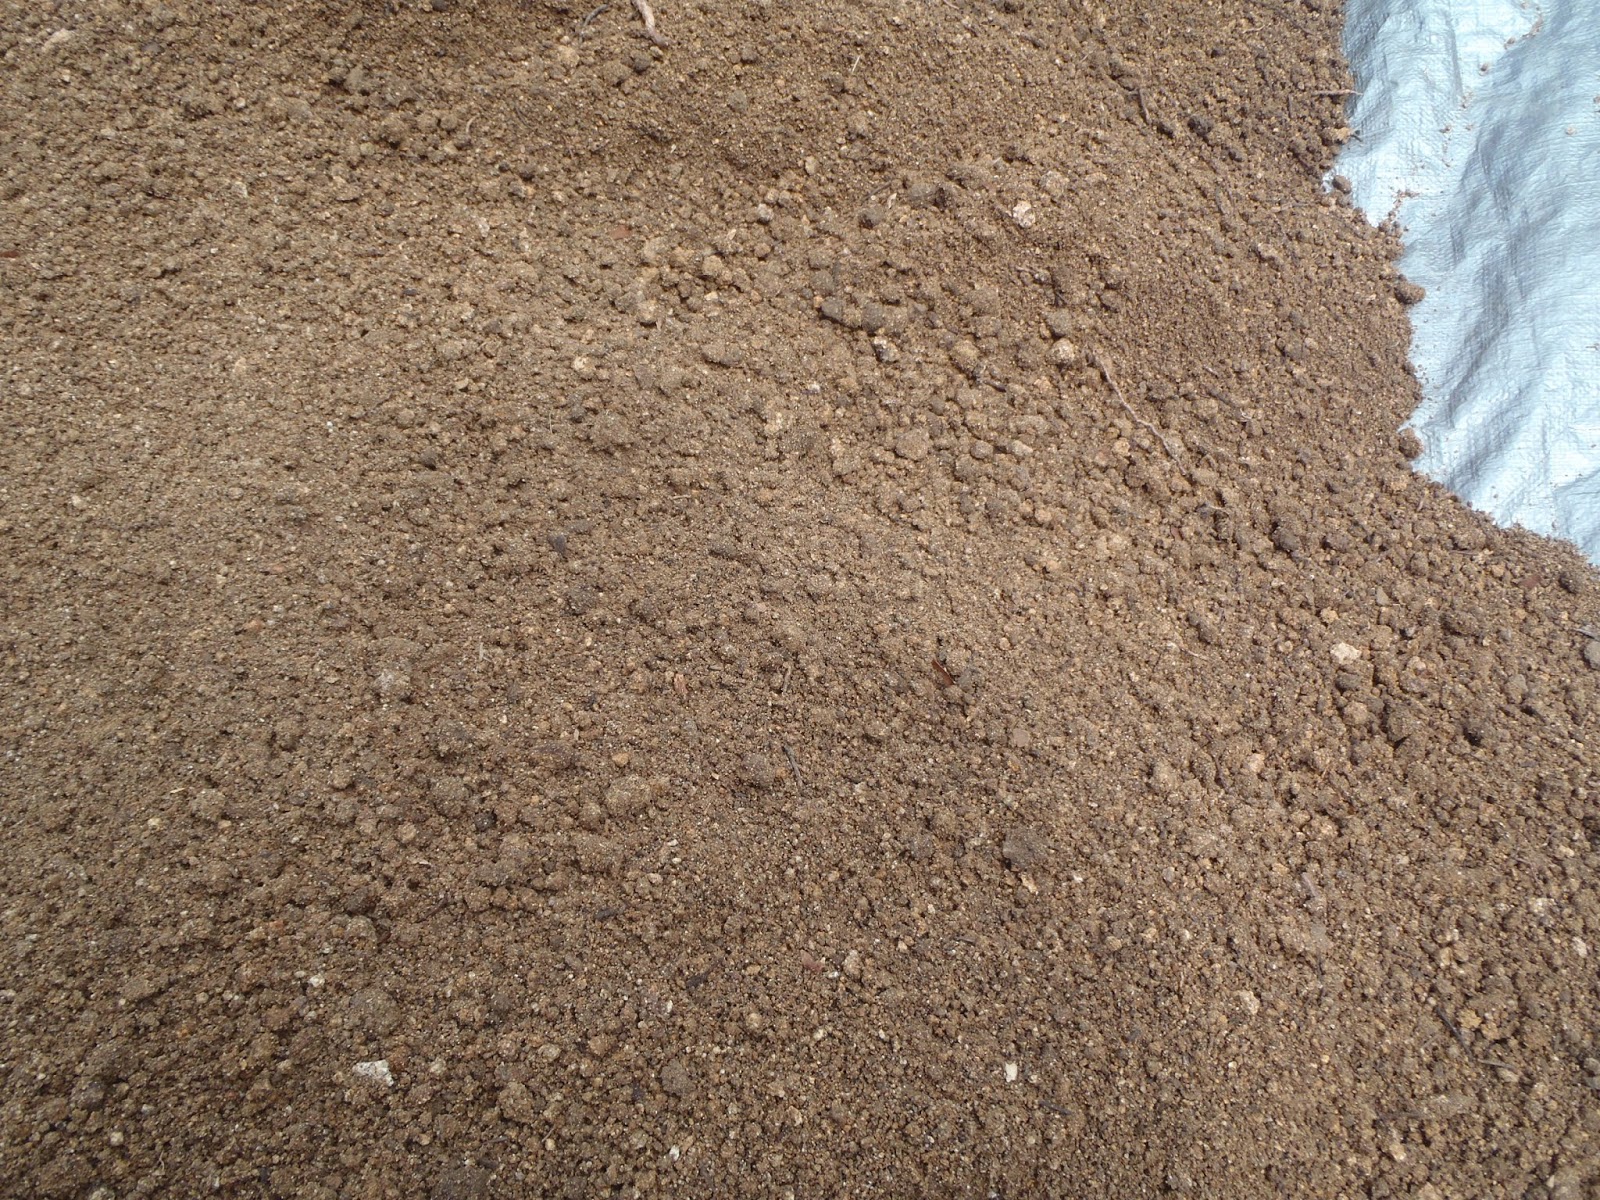 |
| Resultant "coarse" adobe mix ready to use. |
So, we lay down about half an inch of sand on our yurt site. We are laying the sand over a fairly fine kind of gravel anyway, so we aren't worried about perforating the plastic layer (6 mil) that comes next. The plan is for another half inch of sand over the plastic (which will serve as a moisture barrier and a radon barrier) and then our first adobe layer - about 1" of "coarse" adobe mixed with some chopped straw and a little water - it will be tamped rather than poured, so not a lot of water. We then plan for an inch of finer adobe/straw mix (using quarter inch mesh). Our final layer of adobe will be poured rather than tamped and it will go through aluminum window screening.
Today, Saturday, was a work at home day. Tomorrow is going to be a big day on the yurt site. We plan to lay the plastic, put down another half inch of sand and then put down our first layer of adobe and hopefully get it packed. We have a lot of water stashed on site and bought 3g "piss pump" (garden sprayer) that we will use to spritz water on as needed to help with tamping.
Thursday, August 16, 2018
Bond Beam!
Holy crap, yesterday was tough! We put in a very long day. We had some prep work that needed to be done before we could pour our bond beam. Brent bought some flexible landscaping edging (4" tall) and we used some heavy duty metal stakes we happened to have to pin it into place around the inside of our bender board. We used our concrete trowels to help us set the width needed. (It ended up varying as you will see.)
We drove to a spot we had heard of where we could fairly quickly gather up quite a bit of rock. We were gathering 6" and smaller (mostly smaller). We used this to line the bottom of where our bond beam would go. We filled in air gaps to keep from losing/using too much concrete. We used some of the rocks to help level the landscape edging. We again had a lot of tweaking to do to make sure the edging was level all the way around and we double checked our bender board as well.
Brent made two soil screens. One is half inch square and the other quarter inch. I placed the larger on top of the smaller and screened the soil we'd dug out when we first began prepping the site. The stuff screened out by the half inch screen was cast aside. The stuff caught by the quarter inch, but not passed through, I put in its own pile. The soil that went through both screens was caught by a tarp and we used that as our aggregate in the concrete mix. Our mix was 5 parts soil, .5 part portland cement and .5 part hydrated lime. Brent mixed this dry in our huge wheel barrow and then put a part of it into a plastic concrete mixing tray he'd bought. That's where he added the water and mixed it. He had the most strenuous of the jobs. I did the soil screening and then the troweling and leveling of the bond beam. My first experience with such and I was kind of worried about getting it level. The levelness around the length/circumference wasn't an issue as we'd pretty much set that up. However, the leveling between the bender board and the landscape edging was something I had to keep checking.
This is how the bond beam looked this afternoon when we went to check on it. The gray lump in the middle is a tarp over the leftover cement and wheel barrow.
This photo shows a close up of the bond beam going over the top of the utility ports. The rock on the inside of the bond beam was to help hold the landscape edging from bulging out too much.
You can see that we had a sort of scalloped pattern developing. It was from the concrete sort of bulging and pushing out the landscape edging. We could have used more stakes. We put heavy rocks in the worst places. In the end, it kind of looks like we did the scalloping on purpose, a decorative bond beam if you will.
This shows a close up of how we used a rock to help hold the edging in place against the push of the cement. We were getting worried about how much cement we were using.
In the end, we had hauled up 26g of water. We used about 5g per batch mixed (5 batches mixed) - so we used darned near all we brought. We were getting a bit worried about having enough. In the end, we had a little bit of concrete leftover which we used in a few spots in the trench. We were very sore and tired. A late dinner and some extra strength tylenol and we were off to bed.
This afternoon we went up to the site to clean up and haul up some more water. We have been discussing on whether to do a tamped earthen floor, a poured adobe floor or a combination of the two. Tamping uses way less water and should dry faster, but we have noticed that dampness on the soil (being clay) causes it to begin sticking to the tamper. But, gads, all the water that would be needed for a poured adobe floor and then having to mix it and then trowel it all, well it sounds very painful. We're leaning towards a tamped floor right now. Either way, the next few steps are the same. One half to one inch of sand, then a vapor barrier, then another one half to one inch of sand. Lots of sand.....
We drove to a spot we had heard of where we could fairly quickly gather up quite a bit of rock. We were gathering 6" and smaller (mostly smaller). We used this to line the bottom of where our bond beam would go. We filled in air gaps to keep from losing/using too much concrete. We used some of the rocks to help level the landscape edging. We again had a lot of tweaking to do to make sure the edging was level all the way around and we double checked our bender board as well.
Brent made two soil screens. One is half inch square and the other quarter inch. I placed the larger on top of the smaller and screened the soil we'd dug out when we first began prepping the site. The stuff screened out by the half inch screen was cast aside. The stuff caught by the quarter inch, but not passed through, I put in its own pile. The soil that went through both screens was caught by a tarp and we used that as our aggregate in the concrete mix. Our mix was 5 parts soil, .5 part portland cement and .5 part hydrated lime. Brent mixed this dry in our huge wheel barrow and then put a part of it into a plastic concrete mixing tray he'd bought. That's where he added the water and mixed it. He had the most strenuous of the jobs. I did the soil screening and then the troweling and leveling of the bond beam. My first experience with such and I was kind of worried about getting it level. The levelness around the length/circumference wasn't an issue as we'd pretty much set that up. However, the leveling between the bender board and the landscape edging was something I had to keep checking.
 |
| Bond Beam |
This is how the bond beam looked this afternoon when we went to check on it. The gray lump in the middle is a tarp over the leftover cement and wheel barrow.
 |
| Utility ports under bond beam. |
This photo shows a close up of the bond beam going over the top of the utility ports. The rock on the inside of the bond beam was to help hold the landscape edging from bulging out too much.
 |
| Scalloped edge developed. |
You can see that we had a sort of scalloped pattern developing. It was from the concrete sort of bulging and pushing out the landscape edging. We could have used more stakes. We put heavy rocks in the worst places. In the end, it kind of looks like we did the scalloping on purpose, a decorative bond beam if you will.
 |
| Rock supporting edging. |
This shows a close up of how we used a rock to help hold the edging in place against the push of the cement. We were getting worried about how much cement we were using.
In the end, we had hauled up 26g of water. We used about 5g per batch mixed (5 batches mixed) - so we used darned near all we brought. We were getting a bit worried about having enough. In the end, we had a little bit of concrete leftover which we used in a few spots in the trench. We were very sore and tired. A late dinner and some extra strength tylenol and we were off to bed.
This afternoon we went up to the site to clean up and haul up some more water. We have been discussing on whether to do a tamped earthen floor, a poured adobe floor or a combination of the two. Tamping uses way less water and should dry faster, but we have noticed that dampness on the soil (being clay) causes it to begin sticking to the tamper. But, gads, all the water that would be needed for a poured adobe floor and then having to mix it and then trowel it all, well it sounds very painful. We're leaning towards a tamped floor right now. Either way, the next few steps are the same. One half to one inch of sand, then a vapor barrier, then another one half to one inch of sand. Lots of sand.....
Tuesday, August 14, 2018
Rubble Trench Foundation for Yurt
Let's see. Today is Tuesday. We took
last Thursday off and Friday morning off. We biked and we hiked –
so nice! Friday afternoon, Brent dug the drainage trench so any
water the gets into our trench will have a place to drain out and not
become a moat (or skeeter breeding facility). We took Saturday off
as we needed to be at the rental for the delivery of our new futon
mattress! (To go with the frame Brent made – we'll have a
bed/couch futon for the yurt.)
Sunday we hit it hard! We laid the 4" diameter flexible drainage tube (non-perforated) in the drainage trench Brent dug. I then buried it with dirt and created a little rocked area at the outlet for it to drain on. Then we gathered lots
and lots annnnddd lots of rocks. Our friend, Bob, got in on the
action delivering multiple loads of rocks he'd picked up for us.
Brent used our huge 4 wheeled wheel barrow to move the rocks from the
parking area to the yurt site. (The dang thing holds 10 cuft, so you
really have to be careful to not overload it.) We made some
incredible progress on Sunday. It was a long day and we were tired.
 |
| 4" Flexible Drain Pipe |
 | |
| Beginnings of the rubble in the Rubble Trench Foundation |
 |
| North side |
 |
| South side |
 | |
| South and west side |
The big rocks that you see outside of the trench will be our beefy "foundation" rocks on which the bender board and bond beam will rest (and therefore the yurt as well). Some of those were placed before we left for the day.
Brent went up ahead of me on Monday to begin work while I took care of the domestic chores (laundry at the laundromat and some grocery shopping). By the time I got up on site he had put together the bender board and had it resting on top of all our beefy rocks. We worked at gathering more rocks and getting the bender board circle sitting atop them. Scrambling back and forth to try and get the rocks level (and therefore the bender board hopefully as well) and also trying to keep a circle with a 20ft circumference on the inside of the bender board. Monday was mostly about the big rocks and trying to keep them level among themselves. We bought some 2ft tall chicken wire that we then used to make a gabion wall - basically to help hold in place our rock foundation. We then lay some super heavy duty landscape cloth over the top of it and packed our heavy clay soil against it - again to help beef up our foundation. Brent used the 10# tamper to pack what I spread on the cloth and against the rubble wall. See, to make the platform level, our north side wall rises up above the surrounding ground so we want to really stabilize it. The landscape cloth is to keep the soil from filling in all the air gaps among the bigger rocks as that could lead to freeze/thaw issues when moisture gets in there. The landscape cloth is thanks to our friends Bob and Ronnee-Sue.
 |
| Gabion pre-landscape fabric. |
This picture shows the chicken wire creating our gabion fence before we put the landscape fabric and then clay soil over it.
 |
| Exposed gabion on east side. |
This shows some more of the uncovered gabion in the making.
 |
| Partially covered gabion. |

The picture to the right shows the utility "ports". We will have electric (solar), propane and water coming in. It was easier to put them together and we chose the point closest to where the two more troublesome things are coming from (propane - not sure how long their fill hose is, we may be using tanks we can move ourselves; this site is closest to where the well is being drilled).

Here are the ports with the soil packed down around them. We need to get some duct tape to seal them for now to keep rain and dirt out.
Brent worked up a way to help get the circle into a true circle. He figured out how to create 8 equal pie shapes. We knew that each full length across should be 20 feet on the inside of the bender board. He took a straight piece of string between each adjacent point - creating an ocatagon. He figured out what that measurement should be and we went and tweaked and tweaked until everything measured what it should. It was a LOT of going back and forth and it was frustrating. Getting one tweaked often caused something else to shift.


Ideally, these would have all crossed at the exact same point, but we did get them there with tweaking (a lot of tweaking).

So, as it stands now, we need to collect more rock to fill in on the south side of the trench outside of the circle. We also need to put a small amount in a ring inside of the circle - where our bond beam will sit. Brent is already working on the calculations for the materials we'll need for the bond beam. We'll have to haul water in to make the cement for it as we don't have a well up there yet - soon, though!
Wednesday, August 8, 2018
Yurt Platform Progress
So, we left off with the C horizon, clay. We made a big pile of clay outside of the
yurt circle. That took a few days effort
as we just worked mornings until lunch time and then called it quits for the day. It’s hot, Brent has paid work to do and we’re
not twenty years old anymore, so there!
The day finally came when we could level our yurt
circle/platform. We bought a 10# tamper
and Brent beat it into submission while I was off gathering small rocks we’d
need later.
 |
| 10# tamper |
 |
| Leveled and pounded into submission. |
It was looking good!
Then, it felt to me like we ruined it all!
We are creating a rubble trench “foundation” for a “bond beam”
to sit on. The bond beam is where the
lattice for the yurt will rest and be attached and the bender board will hug
the outside of the bond beam (will in fact be the outer form for the bond beam). So, you have to dig down beneath the level
that frost can affect your foundation.
We read that that is about 18” here.
You can do that or dig down to bedrock, whichever comes first. Well, our location isn’t perfectly level, so
we had to dig a lot deeper on the uphill side than on the downhill side.
 |
| North part of trench. |
 | |
| South part of trench. |
 | |
| Supervisor Suki. |
 | |
| Moat/Trench and pile. |
So, we’ve been digging and digging and shoveling and Brent’s
had to bring in the pick axe, too. Lots
of clay, lots of rotten rock and lots of decomposed granite. We’ve been at this for what seems like forever,
though it obviously hasn’t been (3 days really). So, why
do I feel like we ruined our level yurt circle?
Cuz all the crap we dug out of the moat, I mean trench, got tossed onto
our nice level circle. Now there’s a big
mound of clay/rotten rock/decomposed granite.
Much of it will get used in place, but there will still be plenty that
needs moving. Ugh. There just wasn’t a way to do this without
having to move some of the same dirt more than once – so inefficient!

And we've enjoyed some pretty wildflowers:
 |
| Desert 4 O'Clock |
 |
| Sweet 4 O'Clock |
Our next step is to go for a fun mountain bike ride tomorrow morning and maybe a hike with Suki on Friday. Then, we need to gather rocks to put in our rubble trench. Rocks is something this place has a LOT of. Oh, we also need to create a drain out somewhere and fill that with rock, so some more digging to come.
Subscribe to:
Posts (Atom)